Shoti Bread Recipe for a Home Oven
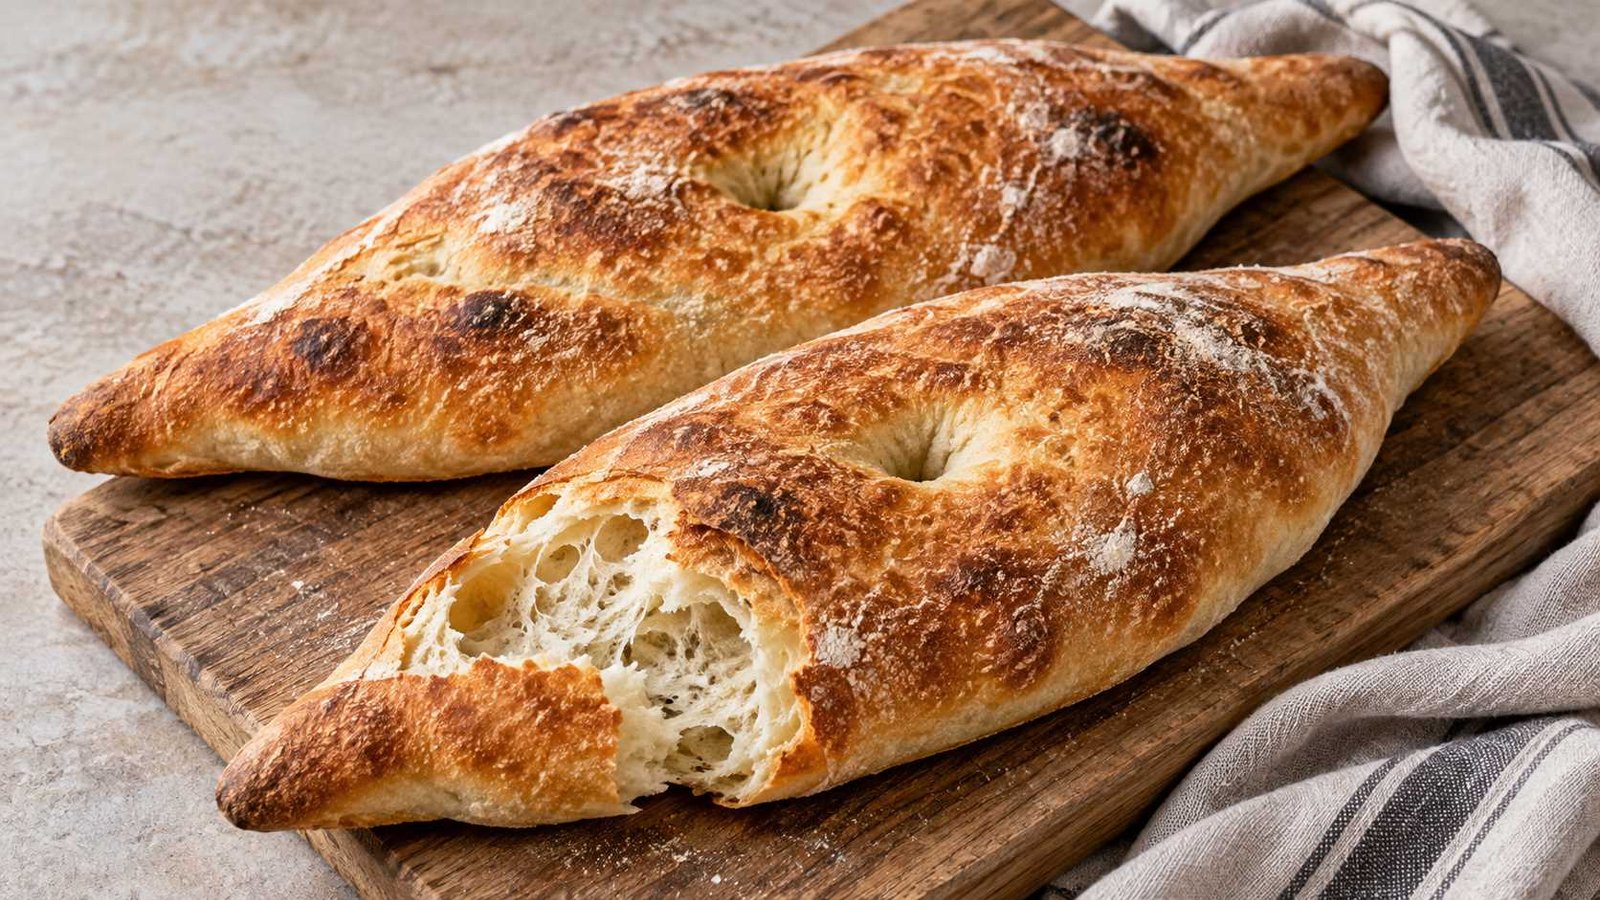
This shoti bread recipe adapts the long pointed Georgian loaf for a domestic oven with a preheated baking stone or heavy tray.
This shoti bread recipe adapts the long pointed Georgian loaf for a domestic oven with a preheated baking stone or heavy tray. Traditional shoti is baked against a tone oven wall; a home oven cannot recreate that contact or shape perfectly. The lean yeast dough still produces a chewy crumb and browned crust. Shape two long loaves with tapered ends, leave the center slightly fuller and bake hot. Serve the bread warm with stews or cheese.
What matters for shoti bread
The dough has only flour, water, yeast and salt. Knead until elastic, then let it rise fully before shaping. A heavy preheated surface supports bottom browning. Avoid improvised attempts to stick dough to a domestic oven wall: this recipe bakes safely on a horizontal stone or tray.
Recipe at a glance
Yield: 2 long pointed loaves. Preparation: about 35 minutes. Cooking: about 20 minutes. Total elapsed time: about 175 minutes. Includes about 120 minutes for the resting, rising, cooling or chilling described below. Extra sequential cooking or baking batches extend the listed time.
How to make shoti bread
Recipe card
Shoti Bread Recipe for a Home Oven
Equipment: Bowl; baking stone or heavy metal tray rated for 250°C; peel; heatproof gloves; rack.
Ingredients
Main
Instructions
Knead dough
Mix flour, yeast and salt. Add water and knead 8–10 minutes until smooth and elastic. Cover in a bowl and rise 75 minutes or until roughly doubled.
Preheat surface
Heat oven to 250°C/480°F conventional with a baking stone or heavy metal tray on the middle-lower rack for at least 30 minutes. Ensure the stone is rated for this temperature.
Shape pointed loaves
Divide dough in half. Rest covered 10 minutes, then stretch each into a 35–40 cm long loaf with a broader middle and tapered points. Place on parchment rated for the heat; use a lightly floured peel if the parchment rating is lower.
Rest and bake
Rest shaped dough 20 minutes. Press a small hole through the central area with a floured finger. Transfer to hot surface and bake 15–20 minutes until browned and cooked through. Bake together if they fit; sequential batches add time.
Cool briefly
Move to a rack and cool at least 15 minutes before tearing or slicing. Do not wrap while steaming. The passive total includes the first rise, dough relaxation, shaped rest and brief cooling.
How to tell when it is ready
Crust is browned, loaf feels light for its size and crumb has no wet dough line.
Tips
- Use bread flour.
- Preheat the surface well.
- Taper ends without making them paper-thin.
- Keep hot loaf uncovered initially.
Troubleshooting
- Pale underside: preheat stone longer.
- Burnt points: make them slightly thicker.
- Dense crumb: allow dough to rise until puffy.
Substitutions
- All-purpose flour makes a softer crumb and may need slightly less water.
- Use a heavy tray if a baking stone is unavailable.
Variations
- Brush the finished crust very lightly with water and cover briefly for a softer bread.
Serving suggestions
- Tear beside a stew.
- Serve with cheese.
- Pair with beans.
- Use for sandwiches once cool.
Make ahead
Mix dough the evening before and refrigerate after an initial rise; let it become workable before shaping.
Storage
Store fully cooled in a bread bag up to 2 days for quality. Freeze wrapped up to 2 months. Warm thawed bread at 180°C/350°F for 5–8 minutes.
Food safety
Keep perishable ingredients at 4°C/40°F or below. Refrigerate perishable leftovers within 2 hours, or within 1 hour above 32°C/90°F. Use clean equipment and separate raw animal ingredients from ready-to-eat food.
Frequently asked questions
Is this tone-baked shoti?
No. It is a home-oven adaptation with the familiar pointed form.
Can I stick dough to my oven wall?
No. Use the horizontal baking surface specified in this method.
More recipes to try



Spotted a detail that needs correcting? Contact the FeastDelights editors.