Brioche Burger Buns Recipe with Eggs and Butter
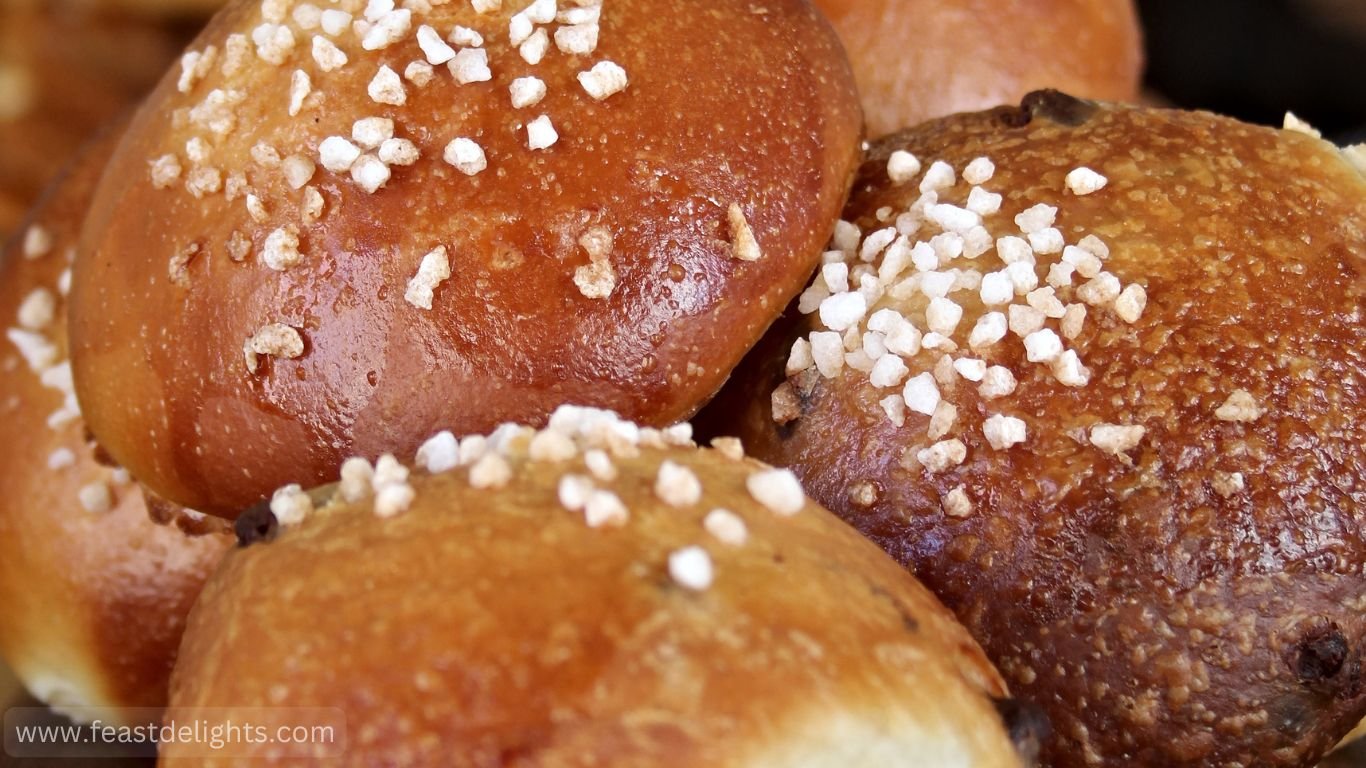
Soft enriched brioche buns with a tender crumb and glossy golden tops.
Brioche buns are rich, lightly sweet rolls enriched with eggs, milk and butter. This version adapts the source’s dough into evenly sized buns with enough proofing time and a measured egg wash. Add softened butter gradually after the dough begins to develop so the gluten can form. The dough will feel soft and slightly tacky; resist adding lots of extra flour, which makes the baked rolls dense. Let the shaped buns rise until puffy, then bake until golden and set. Use them for burgers, breakfast sandwiches or jam. Combine flour, yeast and sugar in a stand-mixer bowl. Add salt, milk and eggs. Knead with dough hook 5 minutes until a rough dough forms. Add softened butter a few cubes at a time while kneading. Continue 8 to 12 minutes until smooth, elastic and tacky.
Recipe card
Brioche Burger Buns Recipe with Eggs and Butter
Equipment: Stand mixer with dough hook, kitchen scale, baking tray, pastry brush
Ingredients
Instructions
Mix dough
Combine flour, yeast and sugar in a stand-mixer bowl. Add salt, milk and eggs. Knead with dough hook 5 minutes until a rough dough forms.
Add butter
Add softened butter a few cubes at a time while kneading. Continue 8 to 12 minutes until smooth, elastic and tacky.
First rise
Place dough in a lightly greased bowl, cover and rise 1 to 1½ hours until doubled.
Shape buns
Divide into 8 equal pieces, shape tight balls and place well spaced on a lined tray. Cover and proof 45 to 75 minutes until puffy.
Bake
Heat oven to 180°C (350°F). Brush gently with egg wash and sprinkle sesame if using. Bake 18 to 22 minutes until golden and the centres reach about 93°C (200°F).
Cool
Transfer to a rack and cool at least 30 minutes before slicing.
How to tell when it is ready
Buns are well risen, deep golden, and the centre reaches about 93°C (200°F); crumb should spring back when pressed.
Tips
- Use softened butter, not melted.
- Add butter gradually.
- Proof until visibly puffy, not by the clock alone.
- Cool before slicing to protect the crumb.
Troubleshooting
- If dough is sticky, chill 20 minutes before shaping rather than adding much flour.
- If buns brown too quickly, tent with foil for the final minutes.
Substitutions
- Use plant milk and vegan butter, though the result will not be classic brioche.
- Replace bread flour with all-purpose flour; buns may be slightly softer and less structured.
Variations
- Add 80 g raisins after kneading.
- Add poppy or sesame seeds on top.
Serving suggestions
- Use for burgers.
- Toast and serve with jam.
- Make breakfast sandwiches.
- Pair with soup as a soft roll.
Make ahead
Prepare suitable components ahead and store them safely. Store cooled buns airtight at room temperature for 2 days or freeze up to 2 months. Thaw and warm briefly before serving.
Storage
Store cooled buns airtight at room temperature for 2 days or freeze up to 2 months. Thaw and warm briefly before serving.
Food safety
Keep egg wash and dough refrigerated if proofing is delayed; bake fully and cool before storing.
Frequently asked questions
Can I make the dough overnight?
Yes. After kneading, cover and refrigerate overnight; let it warm until pliable before shaping, then proof until puffy.
How should I store soft brioche burger buns?
Store cooled buns airtight at room temperature for 2 days or freeze up to 2 months. Thaw and warm briefly before serving.
Use for burgers. Store cooled buns airtight at room temperature for 2 days or freeze up to 2 months. Thaw and warm briefly before serving.
More recipes to try

Spotted a detail that needs correcting? Contact the FeastDelights editors.